The year has come to an end and everyone looks back to what all has happened , the happy times , not so happy times , bad times and most of all the losses occurred which can never be recovered like the huge loss suffered when we lost our beloved grandmama a week back . She was truly one of a kind , not your typical grandmother , no way , nobody can say that she was a conventional grandmother , she was a talented , creative , compassionate woman .
I heard this somewhere ( don't exactly remember by whom ) that perfection is in getting all the little things done right , if that is the case then my grandmama was really perfect because she only cared of the little things , simple things which others just don't bother about but now I know she only thought of those matters that mattered the most .a truly remarkable and unforgettable woman who will be missed by many people who really love her .
My last wonderful memory of her was the pride I saw on her face when I showed her my blog and the cakes I had decorated . She too loved to cook and feed her loved ones . Though she was fussy with her food , she loved to try out dishes I had experimented with .
The best thing was she was the only one who thought I was thin :D which I loved to hear ( wish everyone had her eyes ;p ) . So my dear grandmama , you will be greatly missed , we were all really blessed and fortunate to have you as our grandmama , love.....love...really love you .

Saturday, December 24, 2011
Tuesday, December 13, 2011
Chicken Dum Biryani
Since it's the festive season I thought why not post a recipe of a biryani coz that is what we make for every occasion . Everyone has a different way of making them and this is one of my fav ways . Here the chicken is marinated in an array of aromatic spices and yoghurt is added to make the chicken more tender and juicy . The aroma is itself to make you salivate and the process of cooking it in dum meaning slow-cooking makes the rice so aromatic and you get to taste the flavour of each and every spice in the rice . Trust me it's soooooo good so here goes..................

INGREDIENTS
1 kg chicken cut into medium size pieces
1 tsp ginger paste
1 tsp garlic paste
3 large onion finely sliced
3 green chillies chopped
1 cup chopped fresh coriander
1 cup chopped fresh mint
1 tsp red chilli powder
2 cups yoghurt
half a lemon cut into wedges
dry grind
7 cloves
4 cardamom
1/2 inch pc cinnamon
2 tsp whole black peppercorns
1/2 kg basmati rice
8 and 1/2 glasses of water
for the bouquet garni
7 cloves
2 bay leaves
5 green cardamom
1/2 inch pc cinnamon
10 strands of saffron
1/2 cup milk
3/4 cup oil
2 tbsp ghee
METHOD
Heat oil and fry the sliced onions till golden in a deep bottomed dish
Grind them and set aside
Rub the ginger and garlic paste all over the chicken .
Add the chilli powder , salt , half the mint and coriander, lemon , green chillies , ground spices and the ground onions in the same pan with the oil .
Add the yoghurt and the chicken pieces and leave to marinate 4 hours or preferably overnight .
Soak the saffron in the milk and set it aside
Now bring the whole thing to boil and turn it down and simmer till the chicken is done .
Meanwhile bring the water to boil and add the spices for the bouquet garni and salt to taste.
Add the washed and drained basmati , bring it to boil till the rice is almost done .
Now strain the rice and set aside .
Remove the chicken with its juices in another bowl and add a tbsp of ghee inside the pan .
Add half the rice in the bottom and sprinkle with the safffron milk then add the chicken with all its gravy on the top of the rice .
Add a little of the chopped coriander and mint on top .
Now add the rest of the rice , then the rest of the coriander and mint .
Now pour the rest of the saffron milk and the ghee .
Cover it tightly with a lid and cook on very low fire for about half an hour or till the aroma wafts around the house .
Serve it with pomegranate raita and enjoy :).

Saturday, December 10, 2011
Coffee Milk Cupcakes with Caramel Whipped Cream
While I was going through my food photos , I came across this one and realized that I hadn't put this one up . These cupcakes have a subtle coffee flavour and the frosting is simply the best and very easy too so here goes......

INGREDIENTS
100 gms butter (room temp)
1 cup white sugar
2 eggs
2 tsp vanilla
1 and 1/2 cups all-purpose flour
1 and 3/4 tsp baking powder
1 and 1/2 tsp instant coffee powder
1 cup milk
for the frosting
1 cup whipping cream
3-4 tbsp nestle caramel treat
METHOD
Cream butter and sugar till pale and fluffy .
Add the eggs and vanilla and beat well .
Sift all the dry ingredients together .
Now add the dry ingredients and milk alternately ending with the dry ingredient .
Grease and line the cupcake tin and fill it 3/4th.
Bake in a preheated 180 c oven for about 20-25 min or till done .
Whip the cream till stiff and fold in the caramel treat .
Now top the cooled cupcakes the with frosting and garnish with chocolate flakes or sprinkles if you like .
Monday, December 5, 2011
Crispy Fried Fish with Mayo Tahini Dip
This is an all-time fav in my family , who doesn't love crispy fried fish esp while it's hot and the dip is really delish too . I make this very often as it is easy to put together and also you can freeze them too . The fish is subtly spiced and coated in panko breadcrumbs as this makes it extra crunchy and the zest , tangy dip is the perfect accompaniment to it so here goes.....................

INGREDIENTS
2 large fish fillets cut into fingers
1/2 cup plain flour
1/4 tsp chilli powder
1/2 tsp coarsely ground black pepper
salt to taste
1 egg plus a little water mixed
1 cup Panko breadcrumbs
oil for frying
for the dip
1/2 cup low-fat mayonnaise
2 tbsp yoghurt
3 tbsp tahini paste
zest of a lemon
juice of half a lemon
2 tbsp chopped parsley
METHOD
Mix the flour and the spices together very well .
Dust the fish in the flour mix , egg wash and then finally the breadcrumbs .
Fry them in oil till they are golden and crisp .
To make the dip , mix all the ingredients together and serve with the fried fish .

NOTE
If you don't find panko breadcrumbs , normal bread crumbs is fine .
To freeze the fish , coat them as said above and lay them out on the tray and pop it in the freezer for about half an hour and then pop them in the bag and freeze them till you are ready to use .
You can freeze them for about a week .

Friday, December 2, 2011
Ben 10 Cake
It was my nephew is a huge......huge.... really huge fan of Ben 10 and requested to make him a cake based on that . It was quite a challenge to get the colors right on this one and my arms nearly came off trying to get the fondant dark esp black . Whew... but finally I did it and it was worth it . He loved it and was quite excited seeing the cake.

 ( I wish I was Ben 10 )
The trick to getting the fondant black was by making the chocolate fondant and coloring that black .


The trick to getting the fondant black was by making the chocolate fondant and coloring that black .


Sunday, November 27, 2011
Easy Peasy Banana and Chocolate Chips Muffins
I think it takes half the time to make these than typing it's name ;) . Seriously it's that easy to whip up a batch of this . My kids and hubby loves them so I make these quite often . It's tastes best straight out of the oven so here goes............

INGREDIENTS
3 ripe bananas
50 gms butter melted
1 egg
1 tsp vanilla essence
3-4 tbsp sugar
1 cup unbleached white flour or all-purpose flour
1 tsp baking powder
1/2 tsp baking soda
a pinch of salt
1/4 cup or more if you like chocolate chips
METHOD
In a large mixing bowl , add the melted butter and the bananas and mash them .
Add the egg , vanilla and sugar and mix well
Sift all the dry ingredients together and add it to the mixture .
Mix it up but take care not to over mix it .
Stir in the chocolate chips .
Line the muffin pan with paper cases and bake in a preheated 180 c oven for about 25 min or till done .
This makes 6 large muffins .

Tuesday, November 22, 2011
Mutton in Fried Spices
The recipe I am posting today is an invention test of mine like the Masterchef program and I am happy to report that the curry turned out really delish and also very easy to make too . The aroma itself is mouth watering .Succulent pieces of meat is coated in an aromatic gravy made from whole spices which is fried to intensify the flavour , so here goes..........

INGREDIENTS
1 kg mutton/lamb cut into medium size pieces
1 tsp turmeric powder
1 inch stick cinnamon
4 green cardamom
3 cloves
2 tsp black peppercorns
1 tbsp whole coriander
3-4 dried red chillies
1/2 tsp cumin
1 bay leaf
2 tbsp coconut oil
1 large onion fried till golden
2 large tomatoes
2-3 tbsp of coconut oil
2 tbsp coriander leaves chopped (optional)
METHOD
In a large pan , add the mutton , salt, turmeric and enough water to cook the mutton till done and set aside.
In another pan , add 2 tbsp coconut oil , turn the heat on low and add the whole spices and fry it for a few sec .
Set the fried spices aside and add the remaining oil and add the tomatoes and cook till soft .
Now grind the fried spices , fried onion and the cooked tomatoes to a smooth paste.
Put the ground mixture back into the pan , when it starts to get hot , add the cooked mutton and coat the pieces in the mixture .
Keep on stirring it and cook for a few min .
Add the liquid from the cooked mutton and cook on high heat till the gravy gets thick .
Garnish with the chopped coriander and serve hot with rice , nan or appams.

Sunday, November 20, 2011
Race Car Cake Covered with Fondant
My friend and I had been waiting to make a car cake for a long time and finally we had the opportunity to make one .This was just a trial cake to learn and we were almost satisfied with the results . It was actually pretty easy to make and hardly took any time so here goes.............

We made a square cake and cut it into a rectangle , save the pieces for other accents . The way we cut it is shown below and I hope you can make it out , I tried my best to photograph it according to stages .

The cake is again chocolate cake with nutella whipped cream frosting and is covered with Marshmallow fondant as always .

Thursday, November 17, 2011
Mmmmmm......Tiramisu !!!
I am so impressed by the photographs of my fellow bloggers and also want my photos to look like that so now I am in the process of learning how to take quality pics and the internet is the best place to learn . There are so many good tutorials out there .One thing I have learned is that natural light is the best light to shoot and for the past few weeks I have been running around the house like a mad woman ( my kids really think this ) with a camera around my neck to find the perfect spot in my house where natural light is best .Whenever I find a spot and set up my stuff to take a shot the light might have moved an inch left or right or there is no light at all . The only time natural light is best in my home is at 7 in the morning , who in their right mind would cook then ( I am not that desperate ) .
Finally I found the perfect spot , Mr.Natural Light comes at that perfect spot at 2 - 2.30 in the afternoon , you can imagine my delight at it , I was so happy I called everyone and told them .
Ok , so I found light and have the camera and now for some action ;) . I clicked away like crazy and found a few , very few ( 1 or 2) pics which I thought looked impressive by my standards so here they are.....please be kind , pretty please .....

This dessert didn't even take me half the time I took to take the photo , it's that easy and anyone can make it . This is my absolute favourite dessert , by now all of you got the hint that I am into desserts and this one ranks on top . It's easy to make , heavenly to look at and divine to eat it . It's that good , really trust me . This is an eggless, non-alcoholic version . It is very light and melts in your mouth . This is an old recipe I got from a magazine or I think from the nestle tin , have no idea coz I wrote it down a long while back . I am not boring you anymore ( for those who take the time to read this ) so here goes............

INGREDIENTS
250 ml Whipping cream
1 can nestle cream
250 gms mascarapone cheese
3/4 cup caster sugar
1 cup strong black coffee cooled
24 finger biscuits
cocoa powder to dust
chocolate shavings (optional)
METHOD
Whip the whipping cream till stiff and set aside
In a bowl beat the nestle cream , mascarapone cheese and sugar till well combined
Fold the whipped cream into this mix gently .
Line a loaf tin with plastic hanging out at the sides .
Dip the finger biscuits in the coffee and arrange a layer at the bottom .
Pour half of the cream mixture on top and dust the top with cocoa powder
Again repeat the same process finishing with a layer of dipped finger biscuits on top .
Leave it in the fridge to chill for about 6 hours .
Use the overhanging plastic to lift it out of the tin onto the serving platter.
Top it with chocolate shavings and slice , serve and enjoy : D .

P.S : it's 2 pm , off to take another pic ;).
Saturday, November 12, 2011
Plantain and Coconut Milk Pudding
This is a very unique dish we make for special occasions like welcoming our new year , the beginning of Eid . It is the best thing I have ever tasted especially the one my mom makes and I don't think anyone makes it like her . The soft ripened plantains are cooked in a delicious creamy coconut milk . It tastes really fresh and I think this is a new thing for many of you out there , so here goes.....

INGREDIENTS
1 coconut freshly grated
2 large ripe plantains cut into chunks
1/4 cup basmati rice soaked for at least two hours
3 tbsp split chick peas soaked for at least two hours and cooked
1/2 cup or more ( according to your taste ) sugar
a pinch of salt
1/4 tsp cardamom powder
METHOD
The main thing is the fresh coconut milk in this dish so add 1/2 cup of water to the grated coconut and grind it in the blender really well . Now sieve this and set aside the milk ( you get a thick milk from this )
Do not discard the coconut , put it back in the blender and add 1 cup water and repeat the process , grind it really well and sieve the milk . Do not discard the coconut , add 1 cup more of water and blend it again .
Sieve the milk and now you can finally throw away the coconut ;).
In a deep saucepan , add the last coconut milk and in this add the plantains chunks and cook it till soft , then add the chickpeas.
Meanwhile , when the plantain is cooking , add the second coconut milk in the blender along with the soaked rice and grind it really well .
Add this mixture to the saucepan and stir it really well , by now the mixture will start to thicken , add the sugar , salt and then the first thick milk .
Cook it till it starts to get thick .
Now turn it off the heat and set aside to cool .
You can have it warm or cold , it tastes wonderful both ways .

NOTE
Check if you have to add more sugar , add it according to your taste as the plantains can be sweet or the coconut milk can be sweet .
Tuesday, November 8, 2011
Vanilla and Chocolate Layer Cake with Caramel and Mousse Filling
Eid Mubarak to everyone !!!!! What a fun and hectic week it was with all family and friends getting together , truly it was a week to remember .The best part was the food and that too lots and lots of it and everyting truly delicious .As usual I was in charge of the dessert and decided to go all out for it and I am not one to brag ;) , but the cake turned out superb and everyone loved it .I made a chocolate and vanilla layered cake with white chocolate and dark chocolate mousse filling and caramel so now you know why everyone loved it . It was just superb and above all very easy to make so here goes........

INGREDIENTS
1 recipe of Chocolate cake
1 recipe of Vanilla cake
for the dark chocolate mousse filling
150 gm dark chocolate chopped
1 cup whipping cream
for the white chocolate mousse
150 white chocolate chopped
1 cup whipping cream
1 tin nestle caramel treat
for the frosting
1/2 cup water
2 tbsp brown sugar
150 gms butter softened
11 oz dark chocolate chopped
METHOD
Make the cakes in two 8 inch sandwich tins according to the recipe .
To make the mousse filling , melt the chocolate in a microwave or double boiler till smooth .
Whip the cream till stiff and fold in the melted chocolate .
To make the frosting , In a saucepan add the water, sugar and butter and heat it till it melts .
Now turn off the heat and add the chopped chocolate and stir it till smooth .
It takes a while to set so make it first .
To assemble the cake cut each cake in half horizontally .
Place a layer of vanilla cake , spread 2 tbsp of caramel treat on it .
Now add 3 tbsp of the dark chocolate mousse filling on top.
Place a layer of chocolate cake on top and then add the caramel treat again if you like and top it with the white chocolate mousse filling .
Now repeat the process till you run out of cakes : ) .
Now frost the entire cake with chocolate frosting and leave it to till .
Garnish the top with crushed peanuts if you like .
Serve and enjoy .

Tuesday, November 1, 2011
Spicy Squid Masala
I love squid and my kids love them too , so much that they don't mind the heat in this dish . This is my fav way of making it , no strike that eating it . It is very easy to make , absolutely no skill required and it tastes and looks great so here goes........

INGREDIENTS
1 kg squid washed and cut into rings ( I use the head too )
2 tsp red chilli powder
1/2 tsp turmeric
3-6 garlic cloves minced
1/2 inch pc of ginger minced
1 large onion sliced thinly
5-10 curry leaves
2 + 1 tbsp coconut oil
a pinch of garam masala ( optional )
METHOD
In a pan , add the squid , spices , ginger and garlic and keep on high heat .
When the liquid starts to come out from the squid , lower the heat and cook for about 5-10 min .
In another pan , add 2 tbsp coconut oil .
When it starts to get hot , add the curry leaves and the cooked squid while reserving the liquid .
Be careful , because the squid starts spluttering .
Fry it for a few min and then set it aside .
Add the remaining oil and fry the onion slices till golden .
Add the reserved liquid and when it starts boiling , add the fried squid and cook till the water has evapourated , stirring it frequently, sprinkle some garam masala if using .
By now the masala must have coated all over the squid and gives off a nice aroma.
Serve hot with rice or roti and enjoy .
Sunday, October 30, 2011
Stir Fried Noodles and My 100th Post !!!!
Woohoooo!!!!! I am on my 100th post and all thanks to my mom for instilling in me this passion for cooking . Watching her cook so passionately and effortlessly for family and friends is what inspired me and I want to dedicate this post to her .

The dish I am posting today is quite popular among my family and friends . In school whenver I had to bring something from home my friends always requested for this particular dish .Though I have many favourites of my Mom's , this ranks on top and the best part is there's nothing fancy shmancy about it , it is rather a simple recipe , so without further ado here goes.............

INGREDIENTS
5 pckts of instant curry flavoured noodles ( I use Koka brand )
350 gms of beef cut into small cubes
250 gms green beans cut into 1 inch pc
1 large carrot cut into thin 1 inch pc
1 large green capsicum cut into long strips
1 stock chicken cube
1 tbsp soy sauce + more to sprinkle
pepper to taste
2 tbsp peanut oil or vegetable oil
METHOD
Bring a large pot of water to boil
Add the instant noodles and cook for 3 - 4 min and strain plus put cold water on it to stop the cooking process . Set this aside
In a pan , heat 2 tbsp oil and add the beef , stock cubes and soy sauce and stir fry it till the beef becomes crisp .
Add half of the capsicum and stir fry it till it becomes soft .
Now add the rest of the vegetables and cook till done ( the veggies should have a bite to it ).
Now add half the cooked noodles , pepper to taste , soy sauce and the curry seasoning and toss it all together .
Add the rest of the noodles and repeat the same process .
Toss everything together and if seems a bit dry , add a little oil more oil if needed .
Enjoy it while it's hot .
NOTE
You can substitute beef with sausages or chicken strips .
I have been fortunate enough to receive an award from a fellow blogger and friend Ambreen from Simply Sweet'n Savoury and I would like to thank her for honouring me with this award .

The word 'Liebster' is a German word that essentially means 'dear' and is derived from the verb 'lieber' which means 'to love'. This award has been conceived with the idea to bright to light fledgling and upcoming blogs which have a follower count less than 200.
Here are the rules for this award:
1. Thank the giver who gave the award and link back to his / her blog.
2. Choose 5 blogs whom you would like to give this award and let them know by leaving a comment on their blog.
3. Copy and paste the award on your blog.
4. Hope that your followers will spread the love to other bloggers as well.
5. Thank all who read your blog and wish to follow you and of course - have fun!
I would love to share this award with these wonderful blogger friends of mine . Please have a look at their sites
Jay of Tasty Appetite
Shruthi of A Spoonfull Of Yum
Rajdeep of Rajdeep's cookery
Charissa of http://www.colourfulpalate.com/
Monday, October 24, 2011
Caramel , Apple and Pecan Nut Cake
This recipe came about when I was craving for something sweet and had only an apple and not even a handful of pecan nuts in my house so decided to make do with them in the unhealthiest way possible ; p , if I hadn't made something then the apple would have been thrown out the next day and didn't want to do that . Surprisingly the cake came out really good and it was also simple to make , so here goes.........

INGREDIENTS
3/4 cup granulated sugar
1 tbsp water
1 apple
1/2 cup toasted pecan nuts chopped
50 gms butter
1/2 cup sugar
1 egg
1 tsp vanilla essence
3/4 cup all-purpose-flour
3/4 tsp baking powder
1/4 tsp cinnamon powder
a pinch of salt
1/2 cup milk
METHOD
In a saucepan , add the sugar and the water , mix it up and put on low heat till it just starts to turn burgundy .
Turn off the heat and pour the caramel in a 6 inch baking tin , spread it in the tin evenly .
Add the toasted pecans on it and set aside .
Cream the butter and sugar till pale .
Add the egg and vanilla and beat again .
Sift all the dry ingredients together and add it to the creamed butter alternating with the milk .
Slice the apples very thinly and arrange on top of the toasted pecans .
Pour the batter over it and bake in a preheated 180 c oven for about 20-25 min or till done .
Cool it in the tin for a while so that the apple topping sets and it will easily come out .
This cake best tastes while it is warm .
Friday, October 21, 2011
Red Velvet Cake and Trifle
Now this is the most favourite cake in my household now .I used to wonder what all the fuss was about the red velvet , sure it is the prettiest looking cake and has a rather sexy name but didn't still think it was so great that is until I tasted the frosting and Oh My !!! what a frosting that is , I got the recipe from Joy of Baking , it is the yummiest frosting I have ever tasted . I tried a few different recipes of red velvet cake a couple of times but found it a bit dry to my liking so I tweaked the recipe a bit to make it more moist , I am not bragging here ;p ,but this cake is so moist and light , it just melts in your mouth , even if it is just out of the fridge it is still moist and the frosting is simply the best so here goes..........

INGREDIENTS
100 gms butter softened
1/2 cup light brown sugar
3/4 cup caster sugar
1 tbsp vanilla essence
2 eggs
2 cups of all-purpose-flour
1/4 salt
2 tbsp cocoa powder
1 tsp baking soda
1/2 yoghurt
1/2 cup milk
1 tbsp vinegar
2 tbsp liquid red food colour
for the frosting
200 gms cream cheese
250 mascarapone cheese
3/4 cup icing sugar
1 cup liquid whipping cream
METHOD
Cream the butter and sugars till pale and fluffy
Beat in the vanilla and eggs till mixed well.
Meanwhile sift the dry ingredients together
Mix all the wet ingredients together
Now add the dry ingredients in batches to creamed butter alternating with the wet ingredients.
Grease two 8 " inch sandwich tins and pour the batter in it .
Bake in a preheated 180 c oven for about 25-30 min or till a toothpick inserted in the middle comes out clean .
To make the frosting , in a large bowl add the two cheese and beat it till it softens .
Add the icing sugar to it and beat it again till mixed .
Now add the whipping cream slowly and beat it till stiff .
To assemble the cake , cut each cake half .
Place a layer on the serving plate and add the frosting , add the next layer and repeat .
Frost the cake all over and chill for at least 2 hours .
Now serve and enjoy :D .

Now , I had made this in a small tin , so I had one more layer leftover and a little frosting too , so decided to make a trifle out of it and what do you know , it was really delish , with a layer of the cake , strawberry sauce (strawberries and icing sugar blended together) and fresh strawberries topped with the heavenly frosting . It was really pretty to look at ( I think strawberries make everything look good ) and heavenly to taste .
Tuesday, October 18, 2011
Kerala Style Spicy Beef Fry
I think almost all keralites would agree when I say this that fried beef is the favourtite dish among us .Who can resist the succulent beef coated in nice aromatic spices and then fried in coconut oil to bring out their flavour and the best thing to eat it with is soft delicious appams or a nice , crispy , flaky Kerala paratha .The aroma itself is enough to make you drool . Mmmmm !!! Just telling you guys about it is making me crave to have it . One thing I can guarantee is there will be no leftovers at all . It is finished as soon as it is served . Ok enough of my babbling ( also getting very hungry ) , without further ado here goes..........


INGREDIENTS
1 kg beef cut into cubes
6-8 garlic cloves minced
1 inch pc of ginger minced
3 tsp red chilli powder
2 and 1/2 tbsp coriander powder
1/4 -1/2 tsp turmeric powder
1 tsp fennel seed powder
1 tsp or more coarsely ground black pepper
4-6 green chillies
1 medium onion finely chopped
1 cup water
coconut oil
10-20 curry leaves
4-5 dried red chillies
1-2 tbsp freshly grated coconut
1/2 tsp garam masala (optional)
METHOD
In a saucepan add the beef , spices , ginger , garlic, onions , green chillies and 1 cup water.
Bring to the boil and then lower the heat and simmer till the beef is done . If more water is needed add in , the beef should be just done . If using a pressure cooker , only add half cup water and switch off with 3-4 whistles .
In another pan , heat coconut oil to shallow fry the cooked beef cubes.
Don't overcrowd the pan , fry the beef cubes till it is crisp and set aside .
Add a little more coconut oil and add in the dried red chillies , curry leaves and the grated coconut and fry them for a few seconds.
Now add in the liquid the beef was cooked in and keep on high heat till the gravy thickens .
Now add the fried beef cubes and mix them in the gravy till it coats the beef cubes and sprinkle the garam masala.
This may take about 5 min . Garnish with curry leaves and red chillies and serve hot .
Saturday, October 15, 2011
Pomegranate Raita
Raita is the perfect accompaniment to really spicy dishes . Everyone has a different version of it , this particular one is a family favourite , it is a perfect balance of sweet, tangy and tart with a little hint of spice , it goes particularly well with a spicy biryani and also it is a pretty looking raita so here goes.........

INGREDIENTS
1 pomegranate
500 gms yoghurt
a pinch of chilli powder
a pinch of cumin powder
salt and pepper to taste
METHOD
Cut the pomegranate in half and remove the seeds
Add the spices to the yoghurt and whip it well
Add the pomegranate seeds and mix it well .
Now serve and enjoy .

INGREDIENTS
1 pomegranate
500 gms yoghurt
a pinch of chilli powder
a pinch of cumin powder
salt and pepper to taste
METHOD
Cut the pomegranate in half and remove the seeds
Add the spices to the yoghurt and whip it well
Add the pomegranate seeds and mix it well .
Now serve and enjoy .
Sunday, October 9, 2011
Fondant Ribbon Rose Cake and Red Heart Cake
I have been so lazy to post anything this week , I have to get going , really lazy to do anything . Blogging is one hard job , especially the photographs , I am really bad at it ( thank god for the picnik application ) if it weren't for the online photoshop I don't know what I would do . As I was going through the photographs , I realized that this cake was not posted . I had made this one for my cousin's anniversary , she wanted a small and simple cake so I decided to make this ribbon roses which are really easy , just cut the fondant into long and uneven strips and roll it up and that's it (quite easy right ) . Again the cake here is chocolate with ganache .

The next cake is also an anniversary cake for my cousin . I made this one a long time back , the cake is covered with marzipan and the bow is made out of fondant .


The next cake is also an anniversary cake for my cousin . I made this one a long time back , the cake is covered with marzipan and the bow is made out of fondant .

Sunday, October 2, 2011
Baby Spinach Salad With Pomegranate Dressing
I have been posting so many calorie laden stuff that for a change I thought to post something healthy and also equally tasty .This salad is my hubby's fav ,the spinach is so soft , tender and wonderfully fresh and the pomegranate seeds provide a crunchy texture and the sweet ,sour and tart dressing holds it all together so here goes........

INGREDIENTS
2 cups packed baby spinach washed and dried
1/2 cup pomegranate seeds
for the dressing
1 tbsp pomegranate syrup
juice of half a lemon
1 tbsp honey
salt & pepper to taste
1/4 to 1/2 cup extra virgin olive oil
METHOD
Combine the ingredients for the dressing together and mix it up .
Toss the baby spinach and pomegranate seeds together and pour the dressing all over it and serve immediately .
Sunday, September 25, 2011
Zesty Passion Fruit and Blueberry Cake
This Cake got created coz I had all these fruits about to go bad in my house and wanted to use them and not throw them , I just hate throwing away food . Surprisingly , this cake turned out really great , the combination of flavours worked really well and thankfully I got a good recipe to post.The tartness of the passion fruit and orange juice works really well with the sweet blueberries plus the aroma of this cake is just too good , so here goes......

INGREDIENTS
100 gms butter room temp
1 cup caster sugar
2 eggs
1 tsp vanilla essence
Zest and juice of 2 oranges
Zest of 1 lemon
2 cups all-purpose flour
2 tsp baking powder
Pulp of 1 passion fruit
1 cup of fresh or frozen blueberries
METHOD
Cream the butter and sugar till pale and fluff
Add the eggs one at a time ,then the vanilla and beat it well.
Sift the flour and baking powder together and add it in the butter mixture alternating between the orange juice . Stir in the zests , passion fruit pulp and the blueberries .
Grease and line a loaf tin and bake in a preheated 180 c oven for 1 hr or till a toothpick inserted in the middle comes out clean .
Cool on a wire rack and enjoy .
Tuesday, September 20, 2011
The Best Chocolate Cake Ever !!!
I have been so lazy since I had my vacation that I really needed to make something in chocolate to get me energized and what better thing to make than Nigella's Devil's Food Cake . I so LOVE Nigella , her recipes are so awesome , quick and delicious and also it always comes out just like it says . This is indeed Devil's cake coz this is so good that something this good is always bad for you . The cake is super moist and the frosting is to die for , you really have to try it to know . It's always better to make the frosting before the cake coz the frosting takes time to set and also it does not set very hard but it is indeed the yummiest frosting that I have tasted , it is light and not overly sweet , so here goes...........

INGREDIENTS
for the frosting
1/2 cup water
2 tbsp brown sugar
150 gms unsalted butter
11 oz chocolate chopped coarsely
for the cake
1/2 cup cocoa powder
1/2 cup brown sugar
1 cup boiling water
165 gms unsalted butter room temp
3/4 cup caster sugar
1 and 1/2 cup all-purpose flour
1/2 tsp baking powder
1/2 tsp baking soda
2 tsp vanilla
2 eggs
METHOD
In a saucepan , add the all the ingredients for the frosting except the chocolate and melt on low heat .
Turn off the heat and add the chopped chocolate and stir it into a smooth mixture and set aside.
In a bowl mix the boiling water , cocoa powder and the brown sugar and set aside .
Cream the butter and the sugar till pale and fluffy .
Sift the dry ingredients together .
Add the vanilla in the creamed butter and sugar .
Add eggs one at a time alternating between the dry ingredients .
Add the cocoa mixture in the batter .
Grease and line two 8 inch sandwich tins and pour the batter in this .
Bake in a preheated 180 c oven for about 20 min or till a toothpick inserted comes out clean .
Sandwich the cooled cakes with frosting and spread the remaining frosting on the entire cake .
Enjoy to your heart's content .
Tuesday, September 13, 2011
I am back and have been tagged
Hello everyone , I am back from my very long vacation , had fun with all my family and friends and really enjoyed the monsoons back in Kerala , the weather was just lovely there . There is this game going on in the blogging world called the 7 links and I have been tagged by a wonderful friend and fellow blogger Elisabeth of the food and thrifts . I think everyone must know by now what it is , for those of you who haven't come across this I will fill you in on it . Basically there are 7 categories and we have to link our old posts to these categories and boy that was a tough one , I managed to find for all except one and I hope you guys like them so without further ado here goes..................
THE MOST BEAUTIFUL POST

I love strawberries coz they are just the prettiest looking fruit , I love the taste and the smell of it , I love it so much that my perfume , cologne and shampoo have strawberries in them so I feel my Strawberries and Cream cake is the most beautiful , not did it look good ( atleast according to me ) but it tasted great too .Strawberries and Cream cake .
THE MOST POPULAR POST

According to my views the veggie bake seems to get the most views but sadly there are no comments on it , and I would love to know what you guys think of it ( that is, if anyone has tried it ) , I would love to hear about how the recipe went for you guys out there .
THE MOST CONTROVERSIAL POST
Well , I don't have any such post , sadly I am not that famous to get a controversy ;) . I would love for some suggestions for this one .
THE MOST HELPFUL POST

Now here too , I don't know what post of mine has helped anyone but one soup of mine Creamy Zucchini Soup really helped me relax after the harrowing experience I had ( if you want to know what it was please read the post ;) ) .
SURPRISINGLY SUCCESSFUL POST
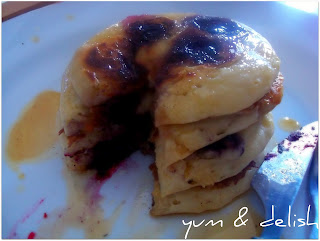
This has to be the pancakes post coz that was the first time I ever got more than 10 comments and that too for something simple as pancakes .
POST THAT DID NOT GET THE ATTENTION IT DESERVED

This has to be my Pita Pizzas coz I thought it was a quick and fun meal with all kinds of possiblities .
POST I AM MOST PROUD OF

I love decorating cakes and do it for fun , so my friend's li'l girl wanted a handbag cake for her b'day , but I was actually terrified of doing it coz the part was big , there were lots of people at it , but they insisted that I do it and I couldn't say no . Though it took a lot of time and hard work , I was satisfied with it but my li'l client just LOVED it , the look on her face after seeing the cake was enough for me and also the cake was a big hit at her party . The pics are not that great coz by the time I finished decorating it , I was too tired to take pics .
I hope you guys like it and tell me what you think of it and one more thing I have to tag five more bloggers and let them know so here they are ....
Nash
Tes
Merut
Shruti
Catherine
Thursday, July 28, 2011
Ferrerro Raffaello Cake and an Anniversary
I know I said I wouldn't be posting as much coz I am on my vacation ( thank you for all the wishes you guys ) but how could I not post today coz today is the day I started my blog a year ago and that was the best thing I had done . I got to post about stuff that I love so much and above all that I made lots of new and wonderful friends from all over the globe . I have to thank each one of you who visited my blog and left comments here , I just love reading them and it really encourages me to do more so a big Thank you to all of you again .
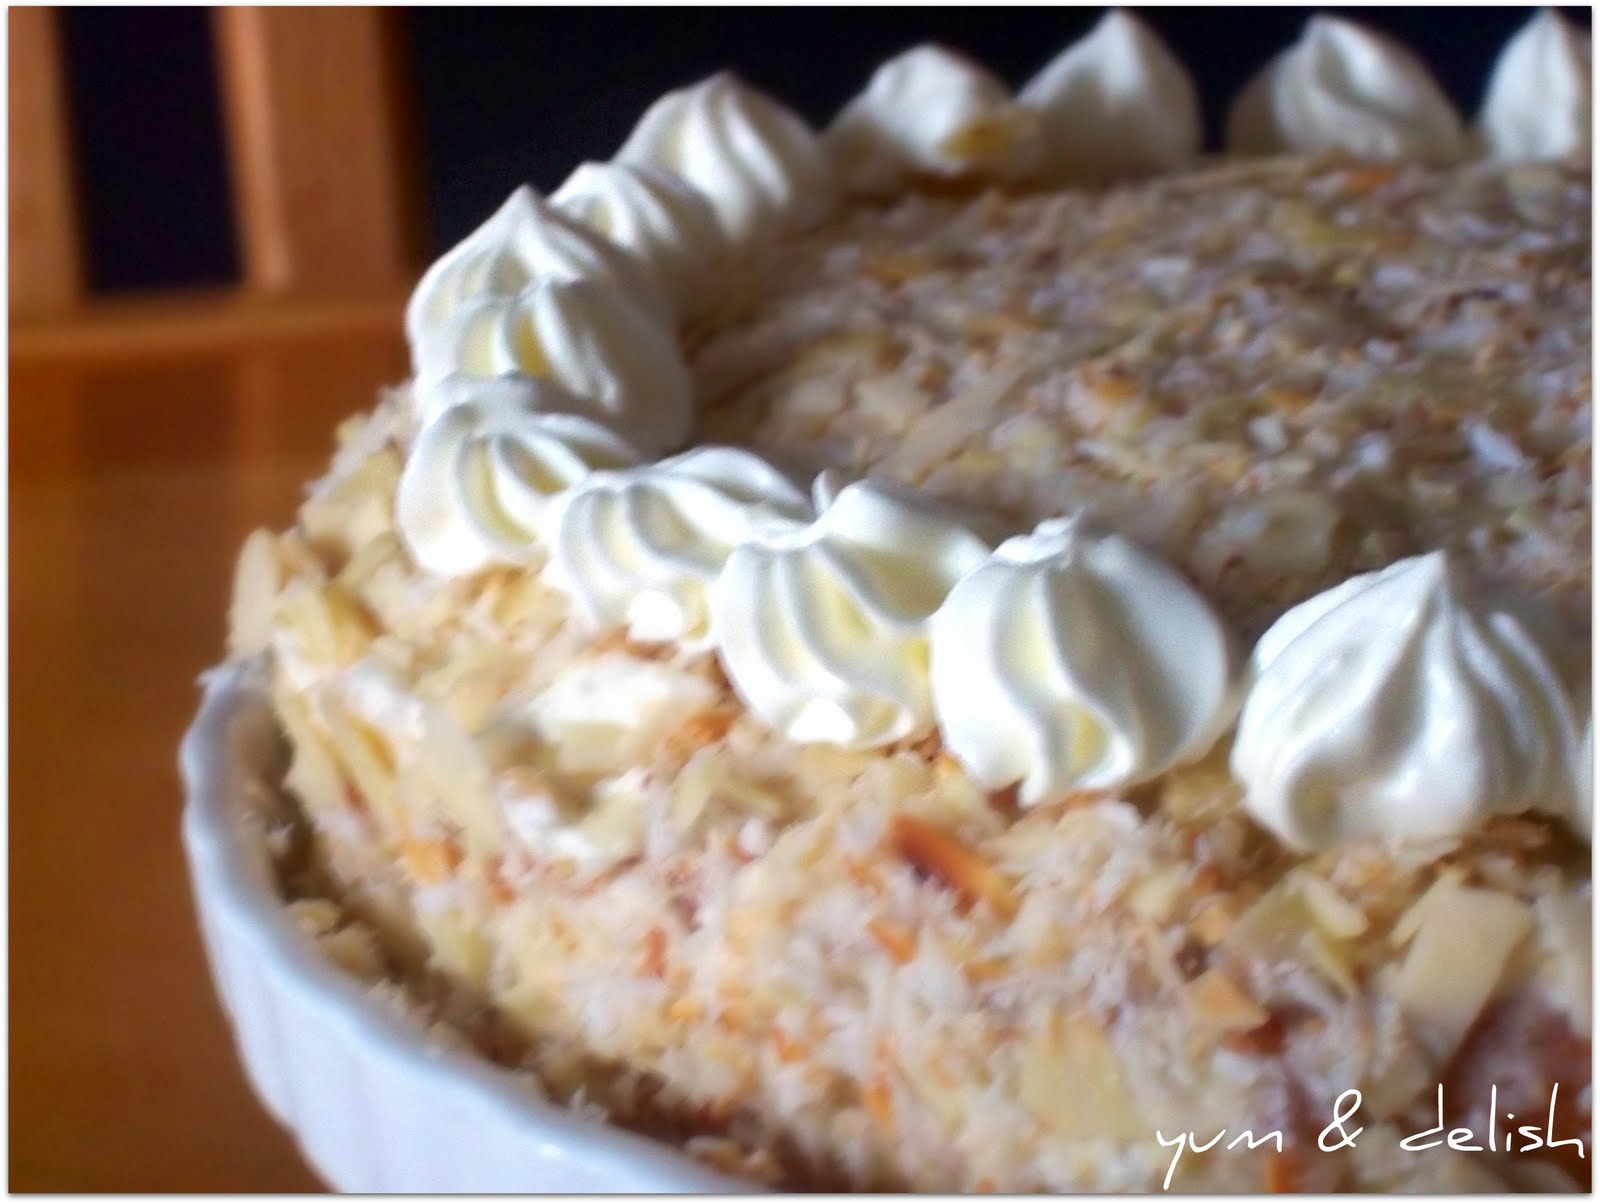
For today's post I had to make a cake and this cake is based on my favorite chocolate and I think all of you know this chocolate I am talking about , it's called Ferrero Raffaello ,the white counterpart of the famous Ferrero rocher . I just love the coconutty taste of this one and I wanted to incorporate this flavor into my cake and I am happy to let you know the results were quite good .

The cake is light and moist with a hint of the coconut flavour and the sweetness of the white chocolate ganache balances well with the light cream frosting and the crunch from the toasted coconut and almonds and I hope you guys like it :) .

INGREDIENTS
100 gms butter room temp
1 cup caster sugar
2 eggs
1 and 1/2 cups all-purpose flour
1 and 3/4 tsp baking powder
1 tsp vanilla essence
1 tsp almond essence
1 cup light coconut milk or 3 tsp coconut milk powder dissolved in 1 cup water
for the white chocolate ganache
225 gms white chocolate
1 cup cream
for the frosting
1 cup liquid whipping cream
2 tbsp icing sugar
for the topping
3/4 cup toasted dessicated coconut
3/4 cup toasted almond flakes
METHOD
Cream the butter and sugar till pale and fluffy .
Add the eggs and beat well.
Add the vanilla and almond essence
Mix the flour and the baking powder well and beat it into the mixture alternating between the coconut milk .
Grease and line two 9 inch sandwich tins and pour the batter in it .
Bake in a preheated 180 c oven for about 15-20 min.
To make the ganache , heat the cream and add in the chopped chocolate and stir it till you get a smooth mixture.
Whip the cream and sugar till stiff .
To assemble the cake , add the white chocolate ganache on top of the cake and cover it with another layer of cake . Add a little more of the ganache on top of the cake and leave it to cool till the ganache is set .
Now frost the entire cake with the whipped cream and top it with the toasted coconut and almonds.
Chill and enjoy .
For today's post I had to make a cake and this cake is based on my favorite chocolate and I think all of you know this chocolate I am talking about , it's called Ferrero Raffaello ,the white counterpart of the famous Ferrero rocher . I just love the coconutty taste of this one and I wanted to incorporate this flavor into my cake and I am happy to let you know the results were quite good .
The cake is light and moist with a hint of the coconut flavour and the sweetness of the white chocolate ganache balances well with the light cream frosting and the crunch from the toasted coconut and almonds and I hope you guys like it :) .

INGREDIENTS
100 gms butter room temp
1 cup caster sugar
2 eggs
1 and 1/2 cups all-purpose flour
1 and 3/4 tsp baking powder
1 tsp vanilla essence
1 tsp almond essence
1 cup light coconut milk or 3 tsp coconut milk powder dissolved in 1 cup water
for the white chocolate ganache
225 gms white chocolate
1 cup cream
for the frosting
1 cup liquid whipping cream
2 tbsp icing sugar
for the topping
3/4 cup toasted dessicated coconut
3/4 cup toasted almond flakes
METHOD
Cream the butter and sugar till pale and fluffy .
Add the eggs and beat well.
Add the vanilla and almond essence
Mix the flour and the baking powder well and beat it into the mixture alternating between the coconut milk .
Grease and line two 9 inch sandwich tins and pour the batter in it .
Bake in a preheated 180 c oven for about 15-20 min.
To make the ganache , heat the cream and add in the chopped chocolate and stir it till you get a smooth mixture.
Whip the cream and sugar till stiff .
To assemble the cake , add the white chocolate ganache on top of the cake and cover it with another layer of cake . Add a little more of the ganache on top of the cake and leave it to cool till the ganache is set .
Now frost the entire cake with the whipped cream and top it with the toasted coconut and almonds.
Chill and enjoy .
Monday, July 4, 2011
Pineapple Delight
Hey all you guys , summer vacation is on the way and this is gonna be my goodbye post , I am going for a long.... long....... really long vacation for almost two months , so Kerala here I come , going to enjoy the monsoons and the fresh air and I am gonna be really busy so won't be able to post quite frequently as I do now but I will popping in to see all my blogger friends delicacies .
Now back to today's post , this is something my sister used to make way back now she is too lazy (ooooh!!! I am gonna get into so much trouble for that ) and I just loved this dessert and had forgotten about it for a long time , so decided to refresh my memory of it . This is sort of like a cheesecake but without the cheese , it is quite creamy ,crunchy ,tangy ,sweet from the pineapples , it has all the textures and flavours for a perfect dessert so here goes..........

INGREDIENTS
10 digestive biscuits
75 gms melted butter
600 ml whole milk
2 eggs separated
300 gms cream
12 tbsp sugar
2 and 1/2 tbsp gelatin + 6 tbsp water to dissolve it
200 gms canned pineapple
METHOD
Crush the digestive biscuits.
Melt the butter and add the crushed biscuits and toast it till a nice aroma comes up.
Put this mixture in a loose based tin and pop it in the fridge to cool it.
Beat the egg yolks with sugar till light and pale .
Heat the milk on low and add the beaten yolks to it , cook it on low heat till the mixture coats the back of the spoon like a custard .
Set the custard aside to cool .
Meanwhile, dissolve the gelatin and mix it in the custard stirring till the gelatin is mixed properly in the custard.
Beat the cream with 2 tbsp of sugar till soft peaks form and fold it in the custard.
Beat the egg whites till stiff and fold it in the mixture.
Now pour the whole mixture on top of the crust .
Add chopped pieces of pineapple and also before pouring the custard , you can add the pineapple slices for garnish and then pour in the custard .
Chill to set and then enjoy .
Wednesday, June 29, 2011
How To Make Marshmallow Fondant
Hats off to the person who thought of marshamallow fondant , I just love using it to decorate my cakes and it tastes absolutely yummy too and above all very easy to make because it's just marshmallows and icing sugar . This is good for people like me who can never get a smooth finish with butter cream , fondant is surely the way to go and not the sugar fondant , but marshmallow fondant . You can even get ready made fondant at the supermarket but believe me they don't taste good at all and since this is so easy to make and inexpensive too , then why waste your money .
Many of them have asked me the recipe for this and the best thing there is no certain recipe , it is just melting the marshmallows and adding icing sugar till you get a nice pliable dough but I have decided to measure what I use for you guys .

The amount of icing sugar also depends on where you live , if you live in a hot and humid place like me then you will need a bit more than those who live in a cooler place . It's just that easy .

INGREDIENTS
150 gms marshmallow
500 gms icing sugar
oil for greasing
METHOD
Lightly grease a bowl and add the marshmallows with a little sprinkling of water .
Microwave this for 30 sec.
The marshmallows will puff up .
Now with a greased wooden spoon beat the puffed up marshmallows and then you get a sticky paste.
Add the icing sugar bit by bit and knead it till it no longer sticks to your hand .
Grease the dough and store it in an airtight container .
You can add whatever color you want .
You can use this straight away but it is always better to use it after a day .
You can also store it in an airtight container for about 2-3 weeks .

TIP
You can also make chocolate fondant by adding 2-3 tbsp of cocoa powder to the melted marshmallow and then proceed to knead it to a smooth dough by adding icing sugar , it's quite yummy .
Another tip is that if the stored fondant seems dry , cover it tightly in a cling wrap or plastic and immerse in hot water for a while just to soften it ,taking care that none of the water gets in . Do not microwave it coz then you will land up with one hot gooey mess .
Subscribe to:
Posts (Atom)